I was doing some work this evening on B&R’s own internal SharePoint sites, and I ran into an issue that kept me scratching my head for quite a while. Here’s the scenario:
We have a really nice Windows Server 2008 box that runs all of our MOSS 2007 sites. On the box, we have 5 different web applications within IIS7 – all for different purposes, such as (for example):
my.company.com -> My Sites
extranet.company.com -> Extranet Site
customers.company.com -> Customer Portal
And to save a few hundred dollars, I went and purchased a wildcard SSL certificate from RapidSSL (I really like these guys – cheap, quick, and I’ve never had a problem with them). For those of you that are not familiar with wildcard SSL certificates, they essentially allow you to SSL-secure all of your sites, so long as they have the same root domain, which in this case would be company.com. So the SSL cert actually secures *.company.com. Therefore, I can have hundreds of subdomains, and only pay for the one certificate, versus explicitly-named certificates for each site.
Now, what I wanted to do was to SSL-secure each one of the three sites, but have them all function on the SAME IP Address. I didn’t want to have to allocate 3 different IP addresses just so SSL would work without conflicts (I could have assigned each site a different port, but I wanted everything running on 443 as well).
I did quite a bit of reading online, and I found a mixed bag – some individuals saying that this couldn’t be done, and others saying it could. Well – I’m here to tell – it can be done (and in particular, in this case, in IIS7)! But the main caveat is that you must purchase a wildcard certificate.
So here’s how you do it:
1. Request, purchase & install your wildcard SSL certificate (make sure that in your request the common name = *.domain.extension). A great primer on requesting & installing SSL certs in IIS7 can be found here.
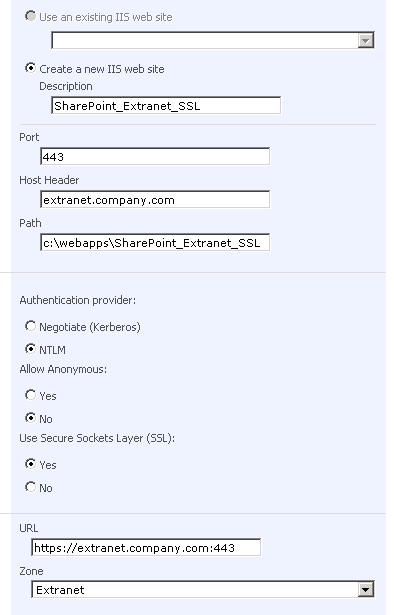
2. You create (or extend) a new SSL-enabled web application within Central Administration. Be sure that you specify port 443, a host header (so SharePoint knows what to respond to), and you check the radio button to ‘Yes’ under ‘Use SSL’. The image below is an example of the settings (note, in particular, that under URL you see ‘https://’ and ‘:443’ automatically added):
3. Once your new SSL web application is created, you will want to open up IIS and take a look. Note that if you already have another SSL site up and running, that site will be stopped, since this new site is conflicting with that one (don’t worry about this). Click on the Sites folder, and take a look at the new site you created – notice something… no host header:
4. Okay – so no big deal, you can just edit the bindings, right? Wrong. Highlight the name of your site and then click on the Bindings action… and see what you get: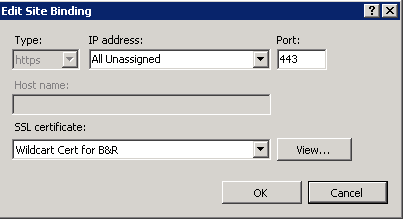
So you’ve got HTTPS, the proper port, and the proper certificate – but host name is grayed out… cripes. This is where the command line comes into play so you can be an IT Hero again.
5. Crack open the command prompt.
6. Browse to C:\Windows\System32\Inetsrv
7. You are going to run the following command:
appcmd set site /site.name:SITENAME /bindings.[protocol=’https’,bindingInformation=’*:443:’].bindingInformation:*:443:HOSTHEADER
So in my case, where my SITENAME = SharePoint_Extranet_SSL and I want the HOSTHEADER = extranet.company.com, my command would look like:
appcmd set site /site.name:SharePoint_Extranet_SSL /bindings.[protocol=’https’,bindingInformation=’*:443:’].bindingInformation:*:443:extranet.company.com
8. If all goes well, you will receive the confirmation message:
SITE object “SharePoint_Extranet_SSL” changed
In addition, if you Refresh your Sites list, you will see:
And if you highlight the web site itself and look over in the actions right-hand window pane, you can also see the SSL host header set there as well:
9. So congratulations – your first SSL host header is configured. Now repeat the process for each additional one under that root domain, and you’re set.
Some Important Notes:
1. This will not work if you want to use one IP address for 2 different SSL certificates under different domains (such as site.xyzcompany.com & site.yourcompany.com). This is specifically for sites that will run under the same root domain.
2. If you receive the error ERROR ( message:Cannot find requested collection element. ) after running the command, make sure that you spelled the site name exactly as it appears within IIS. If you still can’t get it to work, follow my alternate host header setting instructions listed below.
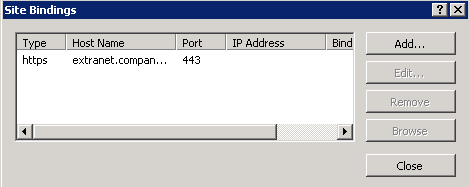
3. If you edit the bindings for the site you’ve performed this configuration on, you will see something like:
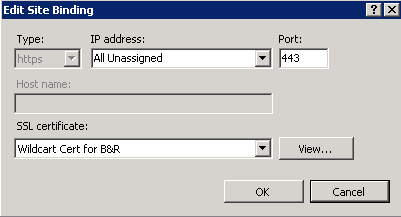
Which looks good – but then if you highlight that binding and click Edit, you will see:
Notice that the host name is gone – don’t worry about it – this is (I assume) because you cannot edit SSL Host Headers through the UI and must use the command prompt. My word to the wise – don’t touch the bindings for these sites through the UI!
Alternate Instructions for Adding the Host Header Binding:
1. Backup the file C:\Windows\System32\Inetsrv\config\applicationHost.config and then open it up in your favorite editor.
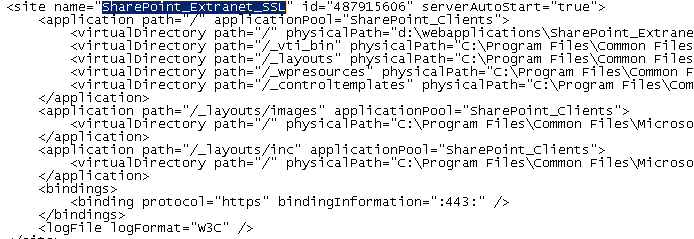
2. Perform a search for the web site you want to edit (in my case, SharePoint_Extranet_SSL). Your search should find the web site along with some related configuration data, just like what you see in the image:
The main area you want to focus on is between <bindings>, as you will want to add your host header after the port – “:443:hostheader” />
So in my case, the binding protocol line would like:
<binding protocol=”https” bindingInformation=”:443:extranet.company.com” />
3. Save this file, refresh IIS, and you will see your change made. Once again, repeat this for every SSL site, and you are set to go!
Technorati Tags:
SharePoint, SharePoint 2007, MOSS 2007, IIS7, Server 2007, SSL



Thank you, thank you, thank you!!! You rock!!
Comment by Mark — January 20, 2009 @ 8:22 am
Yes, you do rock. This is a complex topic and has taken me a great deal of research to resolve, your post was just what I needed. Thanks!!!
Comment by Drew — July 25, 2009 @ 10:09 pm
Thanks alot, really helped me along.
I got the error message you warned about so I went with the alternativ solution. My guess is that I recieved the error due too file level permissions.
Comment by Alles — February 2, 2010 @ 3:41 pm
Terima Kasih…artikel anda sangat membantu….
(Thank You…your article very helpfull….)
Comment by wijaya — March 25, 2010 @ 8:53 pm
Excellent Post! Thank you very much.
Comment by Paul — May 19, 2010 @ 9:08 pm
[…] I’m linking to another blog site for this answer, since he has it written perfectly. https://cregan.wordpress.com/2008/04/11/more-than-1-ssl-secured-sharepoint-site-on-1-ip-address-in-ii… […]
Pingback by IIS 7 Host Header Binding. Working around grayed out Box | Unified Communications the Microsoft Way — November 19, 2010 @ 3:25 pm
[…] https://cregan.wordpress.com/2008/04/11/more-than-1-ssl-secured-sharepoint-site-on-1-ip-address-in-ii… […]
Pingback by Using the ApplicationConfig file to remove site Bindings | Glen Victor — July 23, 2013 @ 10:26 pm
Great post, it works also for me !!!
Comment by WU — February 6, 2014 @ 9:06 am
Is there also a way to change the certificate for all these sites at once. for example, when you have to renew your certificate?
Comment by Benno — April 22, 2014 @ 9:02 am